2017/09/13 (Wednesday)
| 1015 | Solder KF 25mm connection onto other end of recovery gas warming coil. |
|---|---|
| 1045 | On Monday's tower electrical checkout we didn't look at the DIB LEDs. Some of these may work, and we may want to use them. Check them now: |
| Tower Level Checkout | |||||
|---|---|---|---|---|---|
| Detector | S1502 | Date | 2017-09-12 | Who | GR MF |
| DIB | 1 | Face | 5 | Side Coax | ZB1-1-9 |
| +lead | - lead | signal | typical | prev. | measured |
| 9 | chassis | LED1 Rforward | 8 to 9 MΩ | - | < 0.1 nS |
| 9 | chassis | LED1 Vforward | 1.0 to 1.1 V | - | OL |
| chassis | 9 | LED1 Rreverse | <1 nS | - | < 0.1 nS |
| 10 | chassis | LED2 Rforward | 8 to 9 MΩ | - | < 0.1 nS |
| 10 | chassis | LED2 Vforward | 1.0 to 1.1 V | - | OL |
| chassis | 10 | LED2 Rreverse | <1 nS | - | 0.1 nS |
| DIB | 3 | Face | 3 | Side Coax | ZB1-1-11 |
| +lead | - lead | signal | typical | prev. | measured |
| 9 | chassis | LED1 Rforward | 8 to 9 MΩ | - | 0.77 MΩ |
| 9 | chassis | LED1 Vforward | 1.0 to 1.1 V | - | 1.103 V |
| chassis | 9 | LED1 Rreverse | <1 nS | - | 0.3 nS |
| 10 | chassis | LED2 Rforward | 8 to 9 MΩ | - | 0.715 MΩ |
| 10 | chassis | LED2 Vforward | 1.0 to 1.1 V | - | 1.072 V |
| chassis | 10 | LED2 Rreverse | <1 nS | - | 22 MΩ |
| DIB | 4 | Face | 2 | Side Coax | ZB1-6 |
| +lead | - lead | signal | typical | prev. | measured |
| 9 | chassis | LED1 Rforward | 8 to 9 MΩ | - | 0.79 MΩ |
| 9 | chassis | LED1 Vforward | 1.0 to 1.1 V | - | 1.106 V |
| chassis | 9 | LED1 Rreverse | <1 nS | - | < 0.1 nS |
| 10 | chassis | LED2 Rforward | 8 to 9 MΩ | - | 0.763 MΩ |
| 10 | chassis | LED2 Vforward | 1.0 to 1.1 V | - | 1.105 V |
| chassis | 10 | LED2 Rreverse | <1 nS | - | 0.2 nS |
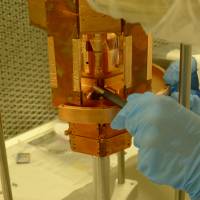
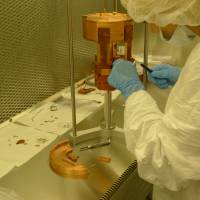
| 1105 | Attach 150mm adapter plate to tower. This is relatively simple: each piece attaches separately to the 30mK stage ears, phillips-head brass screws. Then the bracket bars attach to the bottom, socket-head stainless screws. |
|---|
 |  |
| 651 | 652 |
| 1115 | Discover that you can't put the bracket bars on if the adapter joints are under side coaxes - the side coax extenders block the screw holes! Remove adapter and rotate it to avoid this. |
|---|---|
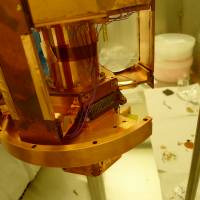
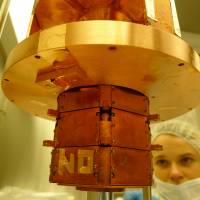
| 1135 | Finish attaching adapter plate, and also tape off holes into the can with copper tape to reduce radiant heat. Tented some of these to help pumpout. |
 |  |
| 653 | 654 |
| 1145 | Double bag tower and put in anteroom. Ready to install. |
|---|---|
| 1211 | Pump out recovery warming coil with scroll pump. Pressure settled at 0.01 mbar. After isolating the pump and letting the coil sit for a while, it creeps up from 10 μbar to 54 μbar over 15 minutes. That's probably good enough. |
| 1330 | Begin tower installation: |
| Align tower with desired orientation: DIB1 points East. | |
| Before raising tower, plug in thermometer wire. Then bunch up excess and tape to top of tower. | |
| Raise tower until adapter touches bottom rim of 30mK can. | |
| Look up at holes to align them with the can. Start a few screws loosely, then insert all screws loosely. It wasn't too difficult this time to get them all aligned. | |
| Torque all screws attaching tower to 30mK can. | |
| Replace stripline heatsink at bottom of IVC middle can. | |
| Check tower thermometer at LakeShore bridge: 1.000 kΩ, all good. | |
| 1615 | Finish installation activities for today. |
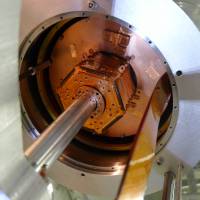 | 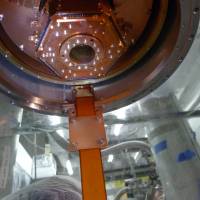 |
| 655 | 656 |