2019/02/27 (Wednesday)
| Status: | Cryocleaned mixture 4 times yesterday. Made 20-mil spacers to mount 100mm electrode. |
|---|
| Cryo | |
|---|---|
| 0915 | Trap 2 is warm. Check contents: 4.2-0.7 = 3.5 mbar on G1. Pump out with scroll pump. |
| 0925 | Start cryocleaning mixture through LN2 Cold Trap 1, V6 = 12.8% |
| 1035 | Increase V6 → 13.1% to restart flow |
| 1025 | Stop cleaning through Trap 1 after 60 min. G2 flow pressure was 570-820 mbar. Pump mixture to dump. Removed 2.2 mbar |
| 1055 | Start cryocleaning mixture through LN2 Cold Trap 2, V6 = 13.1% |
| 1105 | Increase V6 → 13.3% to restart flow |
| 1145 | Increase V6 → 13.4% to speed up flow |
| 1205 | Stop cleaning through Trap 2 after 70 min. G2 flow pressure was 570-670 mbar. Pump mixture to dump. Removed 3.6 mbar |
| 1230 | Trap 1 is warm. Check contents: 4.0-1.8 = 2.2 mbar on G1. Pump out with scroll pump. |
| 1320 | Start cryocleaning mixture through LN2 Cold Trap 1, V6 = 12.8% |
| 1325 | Increase V6 → 13.3% to restart flow. But this is too high: G2 climbs to almost 1 bar. Close the valves and readjust… |
| 1330 | Set V6 to 13.0% to restart flow. |
| 1335 | Increase V6 to 13.1% to restart flow. |
| 1340 | Increase V6 to 13.2% to restart flow. |
| 1415 | Increase V6 to 13.3% to restart flow. |
| 1425 | Stop cleaning through Trap 1 after 60 min. G2 flow pressure was 567-592 mbar (probably no flow for 20 min or so). Pump mixture to dump. Removed 3.7 mbar |
| 1500 | Trap 2 is warm. Check contents: 5.0-1.4 = 3.6 mbar on G1. Pump out with scroll pump. |
| Tower Assembly | |
|---|---|
| 0930 | Clean the new 20-mil spacers. Polish with Scotch-Brite then wipe with methanol. |
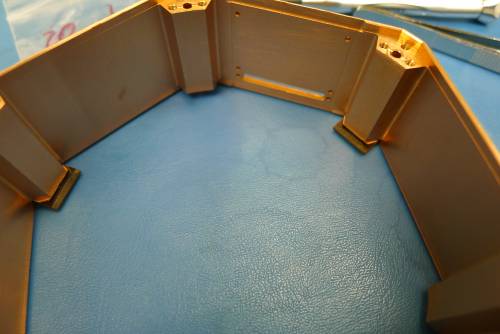
| 1030 | Assemble contact free electrode in source housing using 2×20 mil spacers on each side. Only have enough clamps to use 3 clamps/side. Electrode doesn't move in z direction, but can rotate in this setup. |
 |
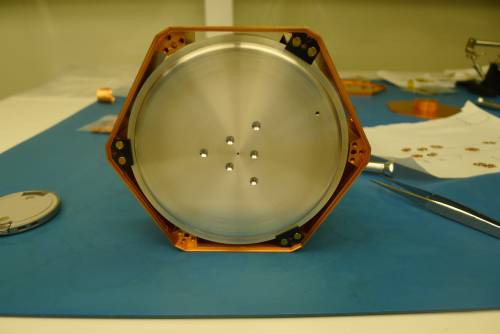
| 1045 | Replaced 3 of the 20 mil spacers on the back of the electrode (away from detector) with 7 mil spacers. This seems to be nice and snug now. This current setup is: Electrode face (clamp, 20 mil, 20 mil), Electrode back (clamp, 7 mil, 20 mil). |
|---|
 |
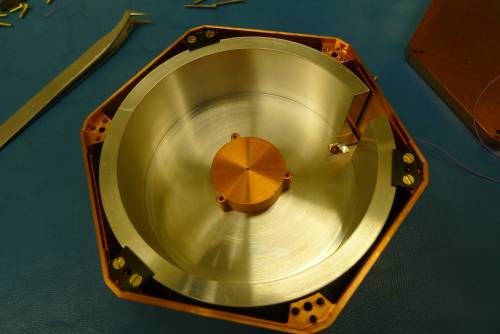
| 1100 | Attach smoke-detector Am source housing to electrode using 1/2-inch flathead brass 1-72 screws. |
|---|---|
| also measured the thickness of the Kapton tape over the collimator hole: 1 mil, or 20 um (at the limit of the caliper's resolution). | |
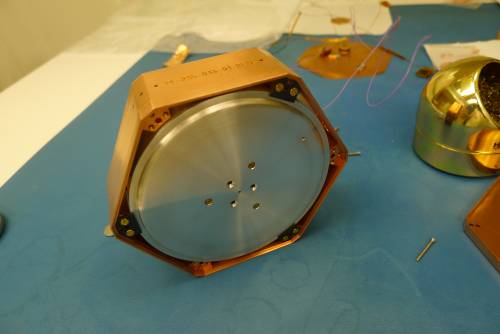
| 1415 | Solder a piece of wire to a piece of copper sheet to screw to the electrode for the electrode contact. |
 |  |
| 1510 | Check connectivity between electrode wire and electrode: around 1 Ω. Check leakage between electrode and housing: < 0.1 nS. Shook the wire around too, no leakage seen. |
|---|---|
| 1530 | Remove G101c from source safe, where it has been sitting with the Cf source for neutron activation for the last 12 days. |
| 1540 | Perform electrical checkout on G101c (copied from Run 66: |
| Detector | G101C | DIB | 1 | ||
|---|---|---|---|---|---|
| date/who: | 2019-02-27 | MF | |||
| +lead | - lead | signal | typical | previous | measured |
| 1 | 2 | QET A | 100 to 200 Ω | 110 Ω | 114.5 Ω |
| 3 | 4 | QET B | 100 to 200 Ω | 59.7 Ω | 59.8 Ω |
| 5 | 6 | QET C | 100 to 200 Ω | 101.6 Ω | 105.0 Ω |
| 7 | 8 | QET D | 100 to 200 Ω | 91 Ω | open |
| 1-12 | chassis | <1 nS | <1 nS | <1 nS | |
| Detector | G101C | DIB | 3 | ||
| date/who: | 2019-02-27 | MF | |||
| +lead | - lead | signal | typical | previous | measured |
| 1 | 2 | QET A | 100 to 200 Ω | no pin 1 | no pin 1 |
| 3 | 4 | QET B | 100 to 200 Ω | 26.0 Ω | open |
| 5 | 6 | QET C | 100 to 200 Ω | 34.2 Ω | 34.4 Ω |
| 7 | 8 | QET D | 100 to 200 Ω | open | open |
| 1-12 | chassis | <1 nS | <1 nS | <1 nS | |
| Detector | G101C | DIB | 4 | ||
| date/who: | 2019-02-27 | MF | |||
| +lead | - lead | signal | typical | previous | measured |
| 1 | 2 | QET A | 100 to 200 Ω | open | open |
| 3 | 4 | QET B | 100 to 200 Ω | 59.4 Ω | open |
| 5 | 6 | QET C | 100 to 200 Ω | 98.6 Ω | 101.0 Ω |
| 7 | 8 | QET D | 100 to 200 Ω | 126 Ω | 131.3 Ω |
| 1-12 | chassis | <1 nS | <1 nS | <1 nS | |
| 1550 | Above looks good - 6 working channels, these are Side1. Side2 has been disconnected. |
|---|---|
| But this detector has no internal LEDs. I think we thought it did. What are we going to do about LEDs? This is a problem. | |
| 1600 | Do a gap test: put electrode housing onto detector housing - seems OK. Repeat with a 10 um thick Kapton strip wrapped over the surface of the electrode, so kapton is between electrode and detector. Pull gently on kapton - it moves with a little resistance. I guess this might be surprising given that the gap is design to be about 700 um. |
| 1610 | Estimate the gap with the caliper depth gauge. This isn't very accurate because you can't get the caliper exactly level, but it should be close-ish. On the electrode: the depth of the outer to inner housing lip is 1.42 mm; the depth of the outer lip to the electrode surface is 0.32 mm. So the electrode rises 1.10 mm above the inner lip. (The inner lips of the housings come into contact.) On the detector: the depth from the inner lip to the detector surface is 1.65 mm. So the gap is 1.65-1.10 = 0.55 mm. Sounds OK. |
| 1620 | Return G101c to source safe for more activation |