−Table of Contents
Gopher Shield Rebuild 2011
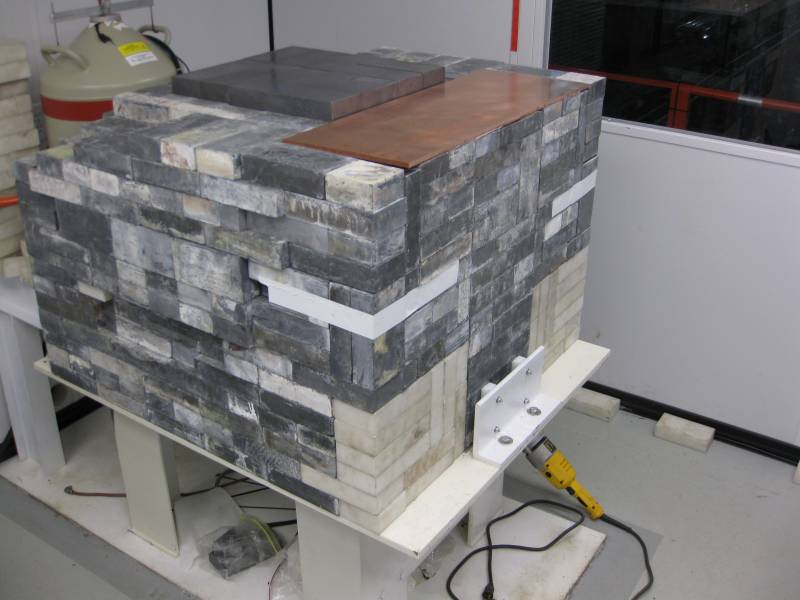
From 12 to 10 in of normal Pb
Overview
We are going to tear down the sides as far as possible, to the steel table ideally, and rebuild with 10 inch walls. Poly will be used in the lower corners/edges. Once you reach the top we need to build a hemispherical cap. I am planning on making a Sketchup layout of the bricks assuming that the last layer is flush with the ULA and shim, ie one normal brick on top of the Cu bridge. We don't have the shim at the moment so the top will have to wait for a latter trip.
There a lot of pictures of the shield going up here for you to peruse.
Tear down and rebuild plan
We can get away with leaving all of the Cu, ULA Pb and the detector in place. We can leave the back end alone where the normal Pb is fitted around the stem. The door is also fine as is.
We should tear all the other normal Pb (on the sides) down to layer 7 where the ULA flairs out and rests on the normal lead. There may be some non cut pieces you'll have to remove from the back to do this. We are leaving the cut pieces around the stem in place and the rest is not finished so you can probably leave most of the normal bricks in the back alone as well. Once layer 7 is reached you should continue to unstack as far as you can, ideally to the table, in a pyramid fashion to support the ULA Pb.
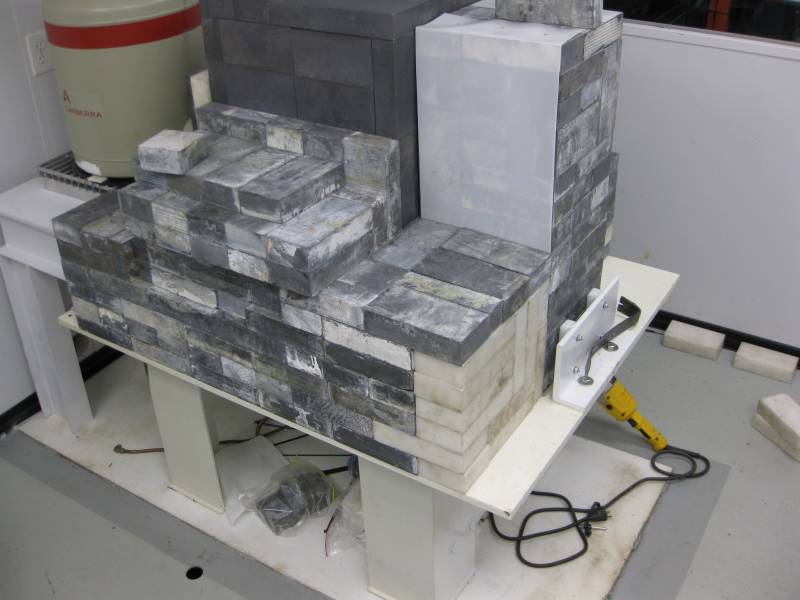
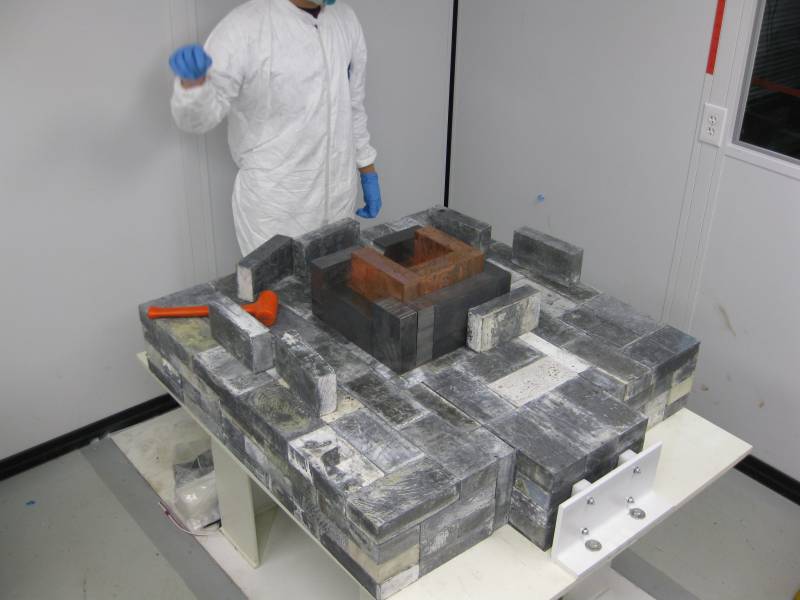
We can then rebuild all the way up the sides and back, in a 36“x36” square, of course with poly on the edges of the bottom layers. It probably will be 36×40 when you include the poly because the box flairs out and you need 10 inches by the door. To support this we need poly or lead out to 2 inches from the outer edge of the door.
Once we get over the ULA box top we can start to round the lead into a hemisphere, using a Sketchup drawing as a guide.
Materials To Procure List
- 0.25“? by 450mm x 500mm OFHC Cu shim
- More poly bricks?
To Do List
- Tear down the normal lead on the sides to layer 7 where the ULA rests on normal lead, stacking pallets up with them and crane them down to the first level. Keep the trimmed bricks under the Cu plate separated.
- Remove non cut bricks from the back as necessary to tear down the sides, leave the cut ones around the stem. There are a few trimmed pieces that do not go around the stem which can be removed if it is necessary to tear down the sides, keep track of them. You can leave the back end 12” thick under the cut pieces that fit around the stem.
- Unplug the cables running to the preamp.
- If possible, fix the gap in the ULA box.
- Tape the ULA bricks together with 1“ Kapon tape so they do not fall while re-stacking the normal lead. Remember to use clean gloves and plenty of alcohol, when in doubt wash it-especially under where the tape goes. Also bag the ULA stack on its own to keep as much dust off it as possible while you work on the lower layers.
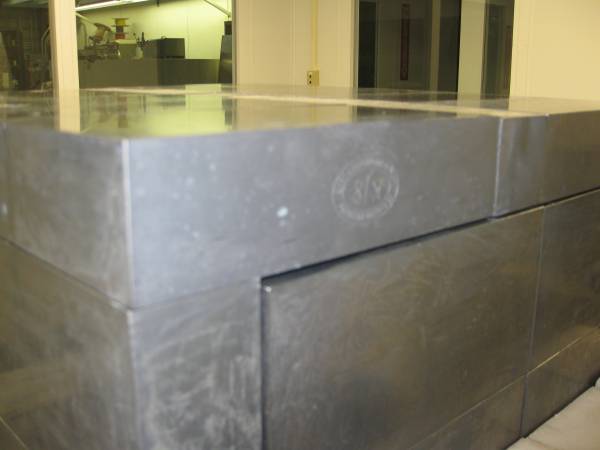
- Keep unstacking the sides in a pyramid fashion, maybe you can remove a lead brick and replace it with poly temporary to support the ULA and steepen the pyramids slope but be very careful that in doing so that you don't crash the ULA stack.
- Restack the normal lead back up to layer 7 using poly in the lower layers edges and corners, 36”x36“ / 36”x40“, basically taking 2 inches off each side. The door should be sticking out by 2 inches from the edge poly. We need to use roughly 30 poly bricks in these lower areas.
- Stack up the sides of the ULA bricks, along with the back over the stem cut pieces as you reach them. Remember to cut down on the horizontal cracks! On the front corners by the door you may have a floating tower of bricks for a few layers as you work around the ULA door frame (Upright bricks that don't move with the door) but that is fine if you tie it in once in awhile. You need to ram normal bricks up against the ULA door frame to keep it from moving around, look at how we did it as you unstack. Use plenty of alcohol! On the back the length is off a 2” grid, use the trimmed pieces that where there before or have the bricks stick out over the edge.
- Re-plug the preamp cables and figure out a way to route them out of the lead stack.
- Use the trimmed bricks (Currently under the Cu plate) on the 15th layer, then add the Cu back in the same place.
- Continue stacking until everything is “flush” with the top of the ULA. You could conceivably have bricks that are on edge sticking up here, but that would force us to cut bricks to fit over the ULA, 450mm x 500 mm not 2 inch increments, so it is best if you can make it flush. There are a bunch of bricks cut in half for this reason.
- Measure the exact thickness of Cu shim we need.
- Place 0.25?“ Cu shim on the top of the ULA. The shim should line up with a normal brick laid on top of the Cu bridge over the door.
- Build the top, coming in to make a rough hemisphere of 10” thickness following the Sketchup design.
- Wrap the stack up for the purge, clean up the room. Jim may move the purge line to run through the floor in gophers clean room as well.
- Cool the detector down.
- Have a better background!
Lead Stacking Guide/Tips
Design
- Always try to break up cracks/lines that intersect the sample chamber, especially the back end where the crystal is. Horizontal layers are fine above and bellow the Cu box, but once there you have to have some vertically laid bricks as well. The vertical lines above and bellow the detector are normally not an issue as you are overlapping anyway to keep the stack stable.
- Leave at least a 1/16-1/8th of an inch gap by the door so it will slide up and down. Closer is better of course but we don't want it to bind. Be careful when hammering bricks in around the door so you don't push them to tight. Running the door up and down every few layers is also a good idea.
Execution
- You should use the putty knife to wiggle the bricks free while unstacking, we really fit them in tight!
- The lead bricks are not exactly square, but some are worse than others. Use the squarer ones when you need to stand a brick on edge. It is also a good idea to try and use the cleaner bricks/sides when stacking up against the ULA layers.
- The existing poly bricks have slightly shrunk with age, new ones might be better. In any case, if the bricks are not lying flat you should shim them up either with poly or the lead shimming. There isn't a whole lot of lead shim material so use it in cases closer to the detector.
- Keep wiping ULA bricks and the normal bricks that touch them down with alcohol. I normally give all of the exposed ULA bricks a wipe down each time I start a new layer that touches them. Use the clean room/lint free wipes not Kimwipes.
- Hammer every brick you lay down towards the center of the stack. When you start a layer guide to the door or cut bricks over the stem.
- Check for squareness and creep often with a square and tape measure, especially in the lower 6 base layers. You should be hammering each brick in to place but the stack has a tendency to widen or start to overhang. Fix it early before it becomes a problem. If you miss it there is a big hammer for whacking the whole thing, just be careful around the door so you don't lose the required gap.
- Use the cart to wheel bricks from the pallet outside into the clean room, stand the bricks on the 2“x8” edge as it is easier to pick them up and you can fit more on the cart.
- You can use spare poly bricks to map out the next few layers before you build them, just be careful not to leave lines into the detector when one poly stacking ends and the other begins. You should take pictures layer by layer when you remove the poly so you remember what you did when you actually use lead.
- Take pictures of the stack as it is built, at least one per layer so we know what is actually down there. It would be helpful to do it from the stool by the odds and ends pile to keep the same view point through out all of the layers.
- You can put the shaved bricks from under the Cu bridge in the odds and ends pile along with the cut bricks from the back, not the ones that fit over the stem-they should remain in place-but the ones along the back side of the ULA box that adjust for it being 450mm wide. The Cu bridge itself should go in a garbage bag on top of the first pallet of bricks you crane off.
- Leave used alcohol wipes on the floor till the end of the day to air out. Then put them and any other Pb contaminated waste in the Pb waste garbage can. When you fill up a bag it has to be sealed and labeled. Jim was in charge of this so I don't really know the specifics.
Safety
- Wear a clean room coverall to keep lead dust off your cloths, there should be enough by the door.
- If you do not have glasses, wear some safety glasses.
- Wear a respirator, there is a box by the door.
- Booties should be worn along with steel toe caps if you do not have steel toe boots.
- Gloves are required whenever you are handling Pb. I like to put a base layer of the 8 mil blue glove down and then just cover it with the cheap latex gloves. It makes it easier to change gloves if you rip one or need to put on clean gloves to handle or wash the ULA Pb.
Where to find things
Greg should know where most things are, but here's a quick list.
- The camera is probably on Jim's desk.
- The mallets, crow bar, putty knife and most other tools you will need are on a chair inside Gopher's room
- The clean room coveralls, booties and latex gloves are in the cabinet by the entrance to the CDMS clean room antechamber.
- The respirators are in the safety cabinet by the safety desk in the connecting tunnel between the CMDS and MINOS caverns. This is also where the blue gloves are but you probably have enough there.
- The alcohol is in the bottom of the left most yellow paint cabinet in the entrance tunnel from the lift to the MINOS cavern.
- I do not know where the lint free wipes are, they might also be in the clean room cabinet.
- I do not know exactly where the garbage bags are, they might be in a cabinet by the stairs to the lunch room. Make sure you use clean ones to bag the detector at night, or at least rip one in half and use the inside if it was lying on the ground before.
Second Rebuild
Overview
From Aug. 15-18 the gopher shield was rebuilt a second time time to make 10 inches of regular lead instead of 12 in order to save lead bricks.
The first day and a half was spent tearing down the previous 12 inch thick shield. The entirety of the layers down to the 7th layer were removed for the sides and front of the detector. The door was not touched. Also, the back was only somewhat taken apart since there were some custom cut bricks to fit around the stem and preamp.
From the 7th layer down, it became more difficult to tear down since the goal was to not take down the ULA lead. Thus, support under and around the ULA needed to be left in place. This created some awkward spaces and brick locations since some bricks could not be removed without tearing everything down. This is the reason for some bricks sticking out beyond 10 inches in the final shield. The final layers were removed in a pyramid fashion to leave enough support for the ULA but also to reach the very bottom layer.
The second half of the second day (16th) was spent starting to rebuild the shield to 10 inches thick. Since the initial rebuild was short on lead bricks, one goal was to use poly bricks in the bottom corners instead of lead. Since these corners are further away from the detector, using poly still allows for 10 inches of lead protecting the detector. The initial suggestion was to use 30 Poly bricks, however this many could not be used comfortably and roughly 20 were used instead. The Poly bricks have shrunk with age, and it was found that the size of the poly bricks no longer matched the size of the lead bricks. A decent number of lead shims needed to be used in order to even out the poly and lead.
Once the initial base was built back (roughly 3-4 layers), the rest of the shield was mapped out with poly bricks in three sections: front, middle and back (respective to the ULA cube). The pictures of each poly layer was used to build the lead, and also shows what exact layering is used for the entire shield Each side of the ULA was built symmetrically, so the map created for one side was equally valid on the other.
- Middle Section: This was mapped at the end of the 16, allowing for the middle sections of both sides to be built with lead on the 17th. Due to the mismatch of English and Metric units, the middle section sticks out more than the front and back. (Post Pictures of middle and brick count)
- Front Section: The previous build had measured and cut a copper plate and some shortened lead bricks to create a ceiling for the door gap. Thus, for this rebuild, the front needed to be planned to reuse those shortened bricks and the copper plate. The copper plate is 12 inches wide and so overhangs the 10 inch walls sticking out with the 12 inch door. Also, some gaps were left on top since the pre-cut lead bricks did not allow to perfectly fill the space under the copper plate. After each layer or two of the front, the door was run down and up to make sure it did not catch on the lead bricks. The front was modeled and fully built on the 17th. (Pictures and brick count)
- Back Section: The back of the shield was trickier since the rebuild had to work around the pre-existing cut pieces around the stem and preamp. Care also had to be taken to allow a path for the wires to get out of the shield. This was done by using the machined brinks from the previous build and other random pieces available. The back was mapped on the 17th and built on the 18th. (Pictures and brick count)
Moving Forward
The last piece of the shield to be built is the top “hemisphere”. Although simple in thought, there are some technical issues to be overcome first.
Since the ULA bricks are cut to metric specifications and the lead bricks are cut to English specifications, a copper plate is needed to make the ULA level with the surrounding regular lead. However, there are further complications. Since lead is a very soft metal, over time the regular bricks have become irregular. Thus, even though there are the exact same number of layers and configuration on each side of the ULA cube, due to individual irregularities with the lead bricks, each side is not the exact same height.
When placing the top layer of regular lead which is taller than the ULA, the height above the ULA for each sides varies from 0.34“ to 0.5” (see pictures for the height described). This means that there is not one thickness for the copper plate which will make all sides level. Opposite sides of the square are more consistent however (front and back, left and right).
The best suggestion is to use long half-bricks (which look like sticks of butter) to build a border around the ULA. Using the half bricks makes a more consistent height for each side. The suggested copper plate size is: 50 cm X 45 cm X 3/8 in. The 3/8 (0.375)“ thickness is suggested since it is in the middle for the heights. To make the levels flat will require bricks placed and shimmed individually.
Conserving Bricks
The goal of thinning the shield to 10 inches was to converse regular lead bricks so there would be enough to finish the top. We are optimistic that this goal was achieved. At the same level in the last build, there was ~90 bricks remaining (half a palette). There are currently a full palette of 180 and ~25 additional regular bricks remaining. There are also many half-bricks (both in square and long varieties) and other odds-and-ends pieces which can be used on top. From back of the envelope calculations for the volume of the top, this should be enough bricks to complete the shield.